Stop motion stick skeleton
This is such a fun Halloween activity to do with children if you have a bit of time on your hands. My children have always loved Halloween and when they were younger, we would spend the whole of October looking for spooky and fun Halloween activities to do and anything involving skeletons was always popular! Making a skeleton out of sticks is also a great way to explore the structure of the human body. Once you have made your stick skeleton, it’s easy to make small adjustments so you can create a stop motion animation. Of course, you can also just make a stick skeleton for fun and you don’t have to create a stop motion video!
What you will need:
Sticks - Mainly straight ones, different thicknesses and a few curved ones for ribs
Light coloured rock for the skull
White water-based paint such as poster paint
A large brush
A tray to pour the paint into (raid your recycling bin!)
A black marker pen
Smart phone or device with camera
Secateurs
Stop motion animation app (I used the free version of Stop Motion Studio)
What you need to do:
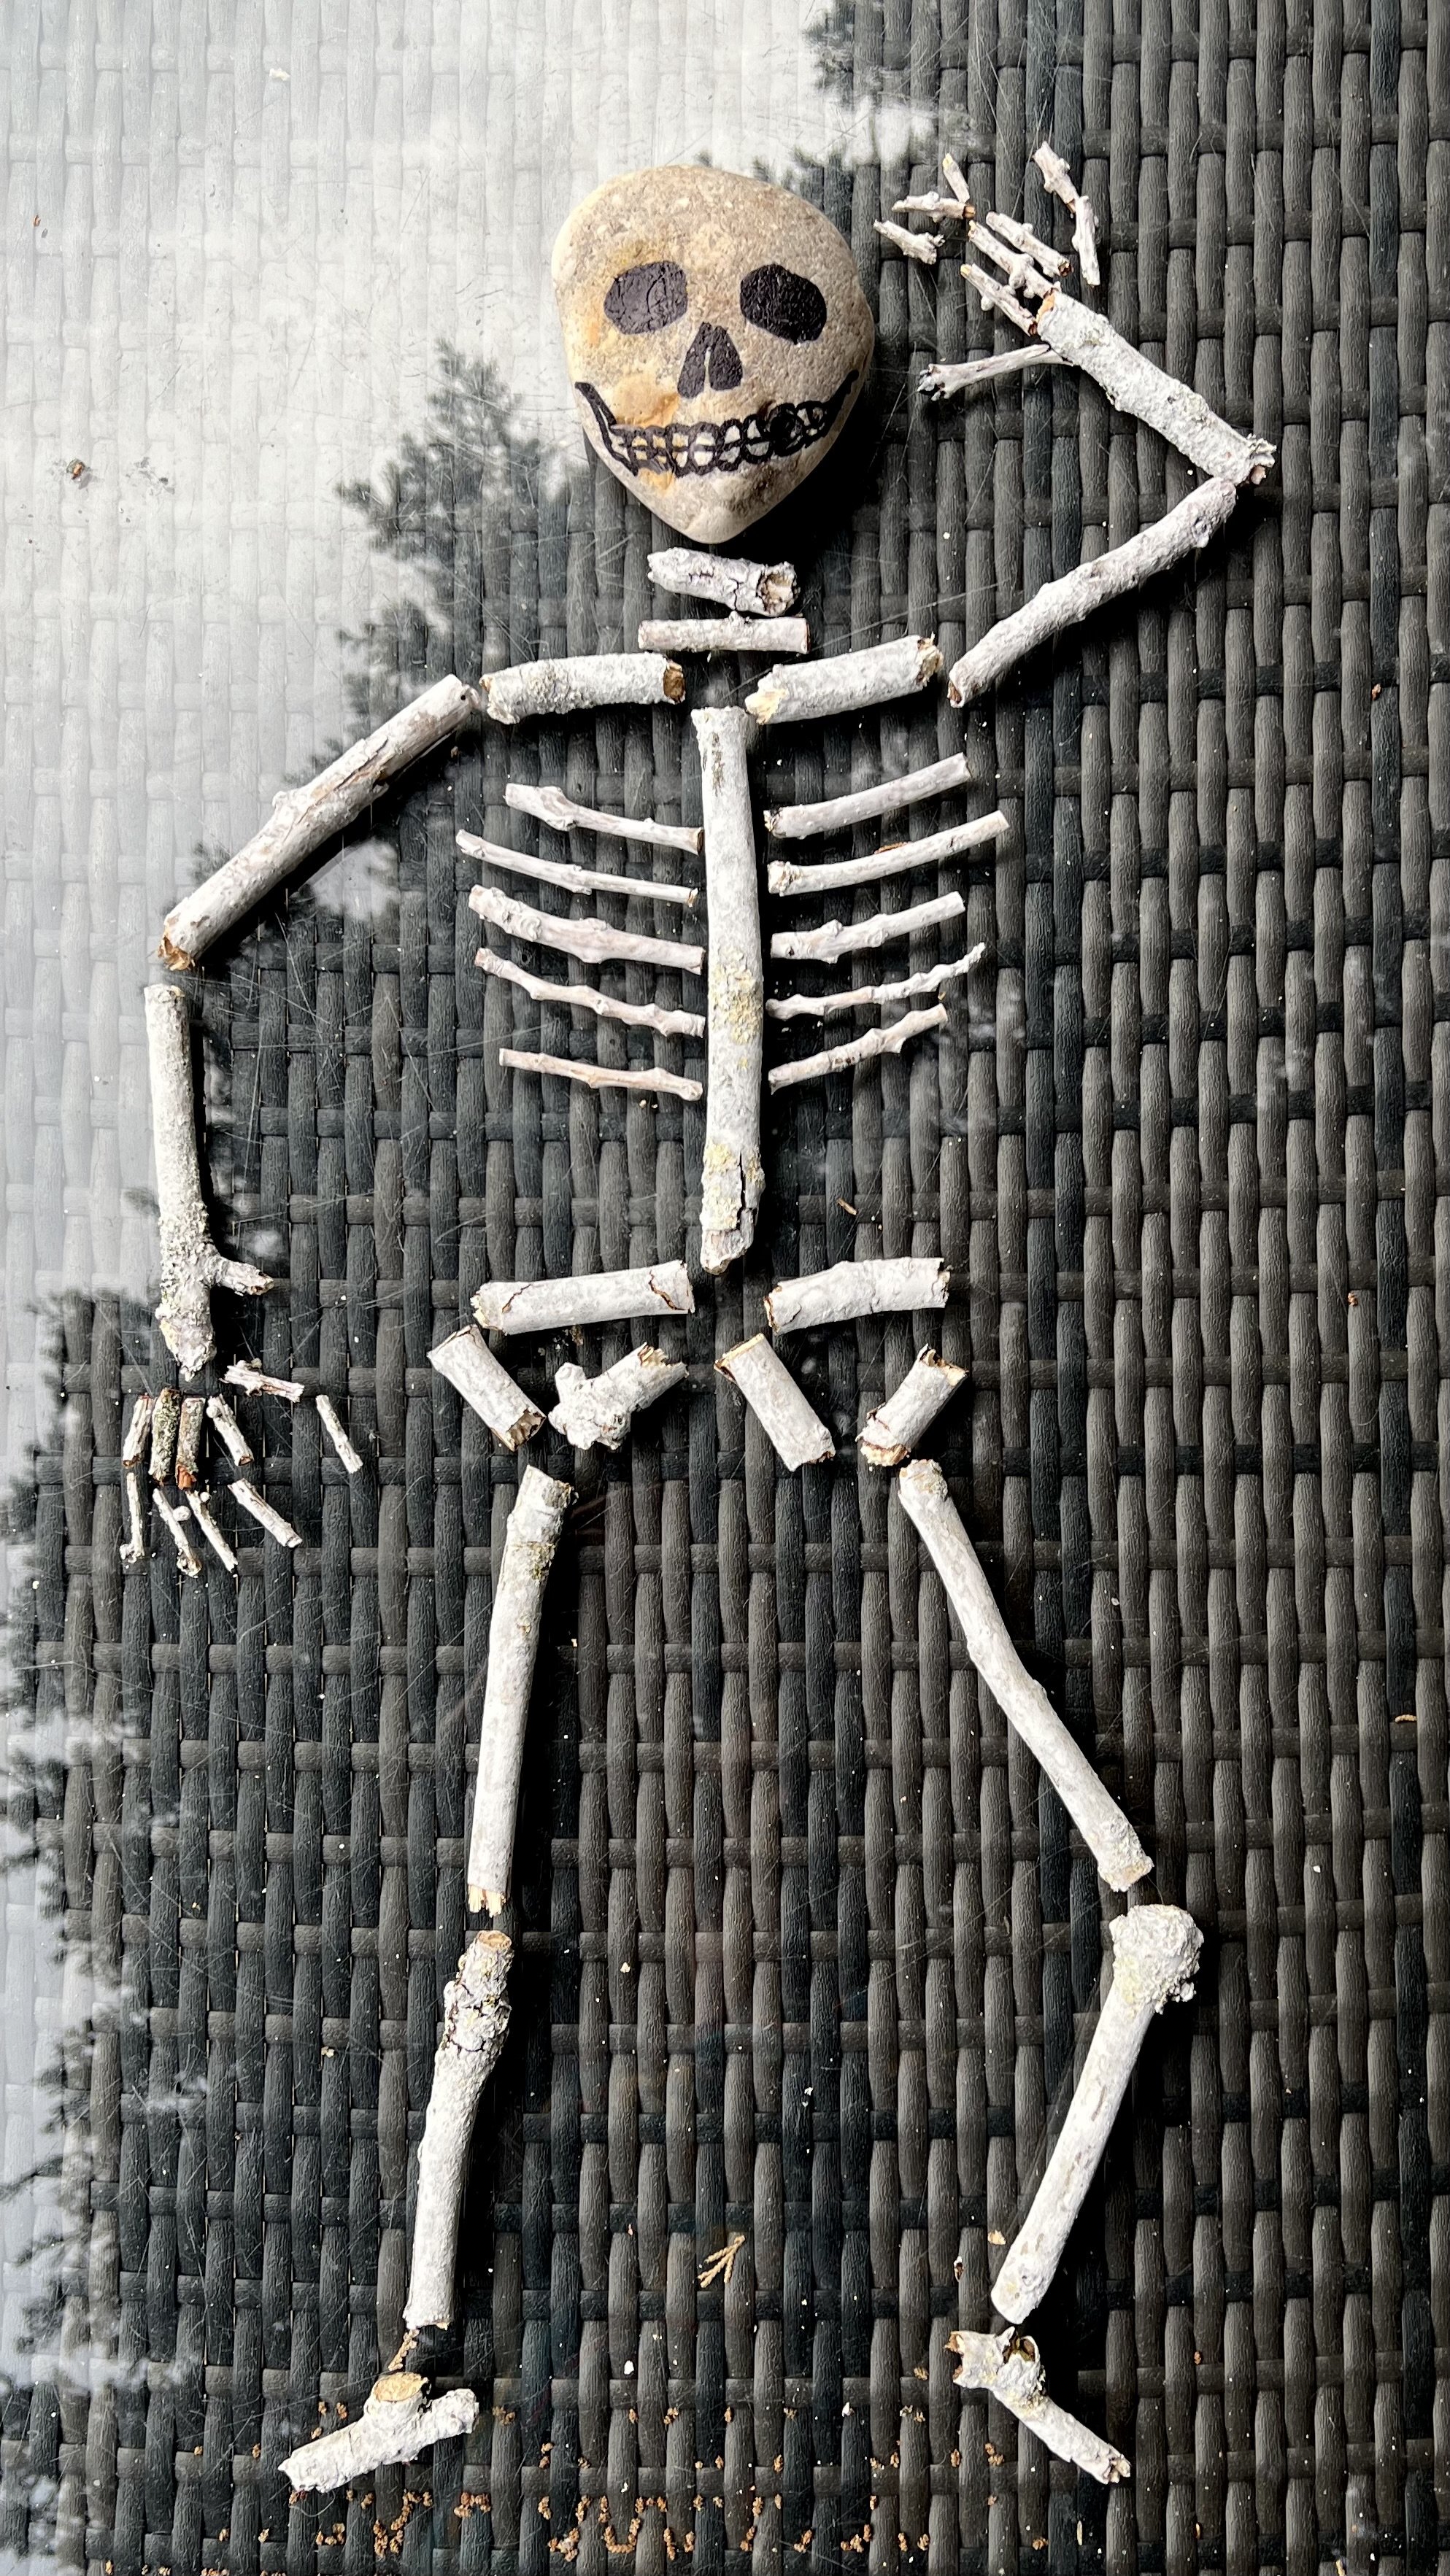
First you’ll need to find your skeleton bones! Go for a walk in a wooded area and gather some sticks. You’ll need a some thicker ones that can be used for the bigger bones such as those in the legs, arms and pelvis, and thinner sticks that can be used for the finger bones and for the ribs. You’ll also need a large rock for your skull.
Once you’re home, spread out your sticks on some newspaper or piece of cardboard and paint them white with some watered down paint and a large brush. You don’t need to be particularly neat - a rough, whitewashed effect looks good! Depending on the colour of your rock, you might need to paint this too. Then leave it all to dry.
Once dry, you can draw the skull on your rock with a black marker pen.


Now you can create your skeleton! You’ll need a flat surface to build on. If you are going to make a stop motion animation then it’s a good idea for your surface to be fairly plain and dark. We used a dark grey blanket on the floor.
Use one of the thicker sticks as a spine and then arrange the remaining sticks as ribs, arms, legs, feet and fingers and the stone skull. You can use secateurs to cut your sticks to size if needed.
For older children, you could print out an image of the human skeletal system which they can use as a reference. Did you know the human skeleton is made up of more than 200 bones? Though your skeleton doesn’t need to be that complex!

Animate your stick skeleton!
Stop motion animation is a film making technique in which objects are photographed in a series of slightly different positions so that they appear to move. Even if you don’t know much about stop motion animation, you’ll have certainly seen it - think Wallace and Gromit, The Trap Door or the fantastic skeleton battle in Jason and the Argonauts.
There are lots of different free apps which you can use to make stop motion animations. The one we used was the free version of Stop Motion Studio. It’s really easy to use and it has some nice features like being able to overlay the previous photo, being able to change the speed of the animation and also being able to review your progress so far.
If you can, it’s good to set up some kind of stand for your device so you can keep it steady and in the same place. I have a phone clamp which I clamped to a stool to create an overhead shot but I have previously used various DIY methods such as taping my phone under the edge of a table or pulled-out drawer. I’ve also taped my phone to the end of a plastic lid, placed it on a stool so it overhangs and then stacked some books on the lid to keep it in place. Be creative! If you can’t get your camera to point down at exactly a 90-degree angle, that’s ok.

If it feels too tricky to create a stand setup, then you can use the onion skin feature in the stop motion app. This allows you to see several frames of an animation simultaneously so you can line up the current frame with the previous one. In the Stop Motion Studio app, there is a slider at the side of the screen which changes the opacity of the last frame. You’ll find that the animation won’t be as smooth with this method, but the resulting slightly jerky movements actually creates a nice spooky feel!

So now you have your camera and skeleton set up, it’s time to start taking pictures! Once you’ve taken a photo, make a small change to your skeleton and then take another photo (lining up your skeleton with the previous photo using the onion skin if you aren’t using a stand).
Keep making small changes to your skeleton and taking photos. The key to making a smooth animation is to keep the movements small. It also really helps to focus on one part of the skeleton at a time, such as the skull or a leg and to review the animation periodically.
Once you have finished your animation you can edit your video to make it look a bit more spooky! For example, you could use a black and white filter, add a vignette or a bit of grain.
Happy animating!

Author: Denise Hope, home educating mum of two boys